NAMES: Laura and Rianna Date: 19th October
|
|
1.
 |
The first shot is a mid shot, however in the background of
the shot there is some action which makes the audience feel as if they are
part of the action, as they are close to the action. This also allows the
audience to see the character’s facial expressions.
|
2.
 |
The camera is faced at a low angle shot, this gives the
main character more power then the audience and gives the impression he is
quite intimidating, due to the fact he is holding a gun. The camera is right
in the action, almost attached to the person. This gives the impression that
this character is very important because the camera is following him.
|
3.
 |
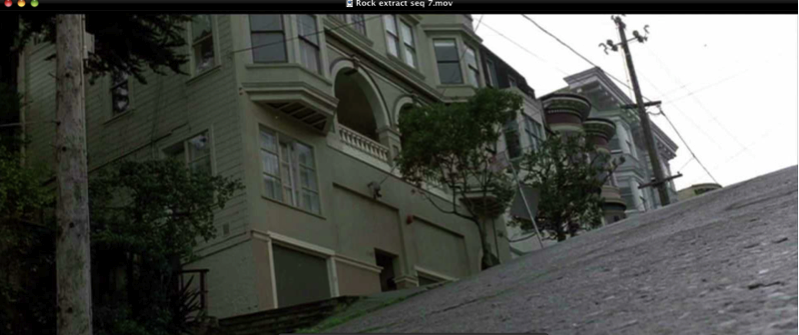
The camera is positioned low down, this allows the
audience to not only view the action of the men, it allows audience to
recognise the Ferrari and indicates the car would be important in later
scenes. The low angle shows how fast the car is when he drives off, this
shows there is going to be a fast chase.
|
4.
 |
The low angle whilst in the car gives Nicholas Cage
authority as well as allowing the audience to see the frantic and anxious
expression on his face. The camera then abruptly cuts to another car and
person and the camera movements are extremely wobbly, almost handheld. This
allows the audience to get extremely close to the action and intensity of the
race. This is an overhead shot, which establishes the scene where the car is
driving through. It then cuts back to the handheld style to get the audience
back into the action again. This is further emphasised by the camera being
attached to the car. Almost to give the audience a feel of what it is like to
be in the car. The camera cuts and has a full on shot of the car that has
recently smashed the shop: this is to surprise the audience to see that the
car is still at the same speed. The camera returns to the handheld style in
the car to make the audience feel as frantic as the driver. The next shot is a
high angle shot, allowing the audience to be shocked by next crash into the
taxi, before again returning to the shaky camera movement to engage the
audience in the emotions of the driver.
|
5.
 |
The camera is at a mid angle to show the audience just how
fast the car is moving. The camera then does a very fast pan following the
police car that crashes into the taxi. This also shows the speed the car is
moving at.
|
6.
 |
The camera is in the car giving the impression it is like
a point of view shot. The camera is shaking as if it is handheld. The camera
then cuts to an extreme close up of the driver in the car, this allows the
audience to see the expressions on his face.
|
7.
 |
The camera is at a low angle, which allows the audience to
see the speed of the cars. It then cuts to an extreme close up of one of the
characters and we see the anxious look on his face. The camera then is
directly in front of the cars, which shows the audience the direct action. It
then cuts back to the man in the car in a close up: the camera is shaking once
again like it is handheld. The camera is once again at the low angle, to see
how fast the cars are travelling, there is then a long shot allowing the
action to pass the camera, and carry on into the distance. This shows the
fast pace action.
|
8.
 |
The camera is close up to the character, showing his
expression, and shakes to mimic the movements of the car. It then cuts to the
other character. This shows his frantic expression. Both their expressions
looked stressed and angry.
|
Wednesday, 23 January 2013
The Rock Assessment
Tuesday, 22 January 2013
Filming Day
On the 12th of January Laura, Kiah and myself filmed our opening sequence with the help of two voluntary actors! We tried to film as many shots as possible, so that if when we are editing we have a lot of material to work with. During the shoot we had to bear in mind all of the hazards which could have taken place, especially as during the shoot the lights did get quite hot.
During the shoot we made different decisions to what was storyboarded at some points, because we found that some of the shots would work better than the ones which we had originally planned. We also filmed some extra scenes which we will edit together to create a behind the scenes film. Overall, our day of filming went well and we hopefully managed to capture shots which will be able to create an opening sequence which will appeal to our target market.
During the shoot we made different decisions to what was storyboarded at some points, because we found that some of the shots would work better than the ones which we had originally planned. We also filmed some extra scenes which we will edit together to create a behind the scenes film. Overall, our day of filming went well and we hopefully managed to capture shots which will be able to create an opening sequence which will appeal to our target market.
Monday, 14 January 2013
Group Discussions 10/01/13
In the lesson today we conducted our audience research. We interviewed three students who were not media students and asked them a series of questions to do with their film habits, such as what genre of films do they watch the most, how many films on average they watch each week etc...
We videoed their responses and uploaded them onto the group blog. We also carried on planning our filming day, which is the 12/01/13. We finalized our cast members and decided on the most appropriate filming times.
We videoed their responses and uploaded them onto the group blog. We also carried on planning our filming day, which is the 12/01/13. We finalized our cast members and decided on the most appropriate filming times.
Titles Analysis
A title sequence is a method in both films and television
programmes where the most important contributors to the film/programme is displayed, such as the title, cast members, key production members are presented.
The title sequence is different from opening credits, which is where the most
important members of the production are presented.
Title sequences usually have
music incorporated into them, but this is not always, this can depend on the genre, and type of opening sequence the film makers have wanted to create. Closing credits usually occur in very small print, which contrasts to the titles at the beginning of a sequence because the writing usually stands out and is hard to avoid reading, especially when there is little action happening in the background, or there is a blank screen behind.
There are different ways to display a title sequence at the
beginning of a film.
When films have a separate sequence altogether, it is known as a title sequence. One of the best examples of this is James Bond: Goldfinger (1964).
When films have a separate sequence altogether, it is known as a title sequence. One of the best examples of this is James Bond: Goldfinger (1964).
Today, titles are usually put on a black screen or on top of
the action as it is happening. Below are various examples of different titles.


Friday, 11 January 2013
Lift and Stairs
Whilst editing the "Lift and Stairs" sequence it was important that I used match on action, which not only helped to create narrative, but it helped to create tension and suspense through various cutaways. I also used different tools on Final Cut to speed up time, in order to not lose interest.
Wednesday, 9 January 2013
Group Discussions 09/01/13
In today's lesson, we uploaded all of our information on and photos onto our group blog. We also decided that in the next lesson we would try to do some audience research.
Group Discussions 07/01/13
Today, Kiah, Laura and I decided on who our cast would be and wrote the script. We decided on a location for our opening sequence and conducted a risk assessment of what potential hazards there could be. We looked at costumes, and booked the cameras.
Subscribe to:
Posts (Atom)